I’ve been seeing people post super realistic AI photos of themselves online, and I’d love to make some for my social profiles and portfolio. I tried a couple of random AI photo apps, but the results looked distorted or nothing like me. Can anyone recommend a good AI photo generator app and explain the steps to get high‑quality AI photos of myself, including what kind of selfies or reference photos I should upload?
Creating AI photos of yourself turned into one of those things I thought would be a pain, like booking a real photo shoot. Studio, lighting, awkward poses, the whole thing. Then I tried a bunch of the iOS apps and ended up never touching my DSLR again for profile stuff.
Here is what I found testing three of them over a few evenings.
1) Eltima AI Headshot Generator (iPhone app)
Link:
I stumbled into Eltima AI Headshot Generator when I needed a new LinkedIn photo and had about 10 minutes before a call. No sign up screen, it just opened.
What I did:
-
Upload
I threw in 3 normal selfies from my camera roll. One in the kitchen, one in the car, one at my desk. All in decent light, nothing “professional”. No filters. -
Pick packs
Inside the app, they split stuff into packs. For me it looked roughly like:
- Business and LinkedIn style photos
- Casual lifestyle stuff
- Travel and “somewhere else” type scenes
- Social media friendly looks
I went through a few business and casual packs. Each pack had multiple variations, so you do not end up with copies of the same pose.
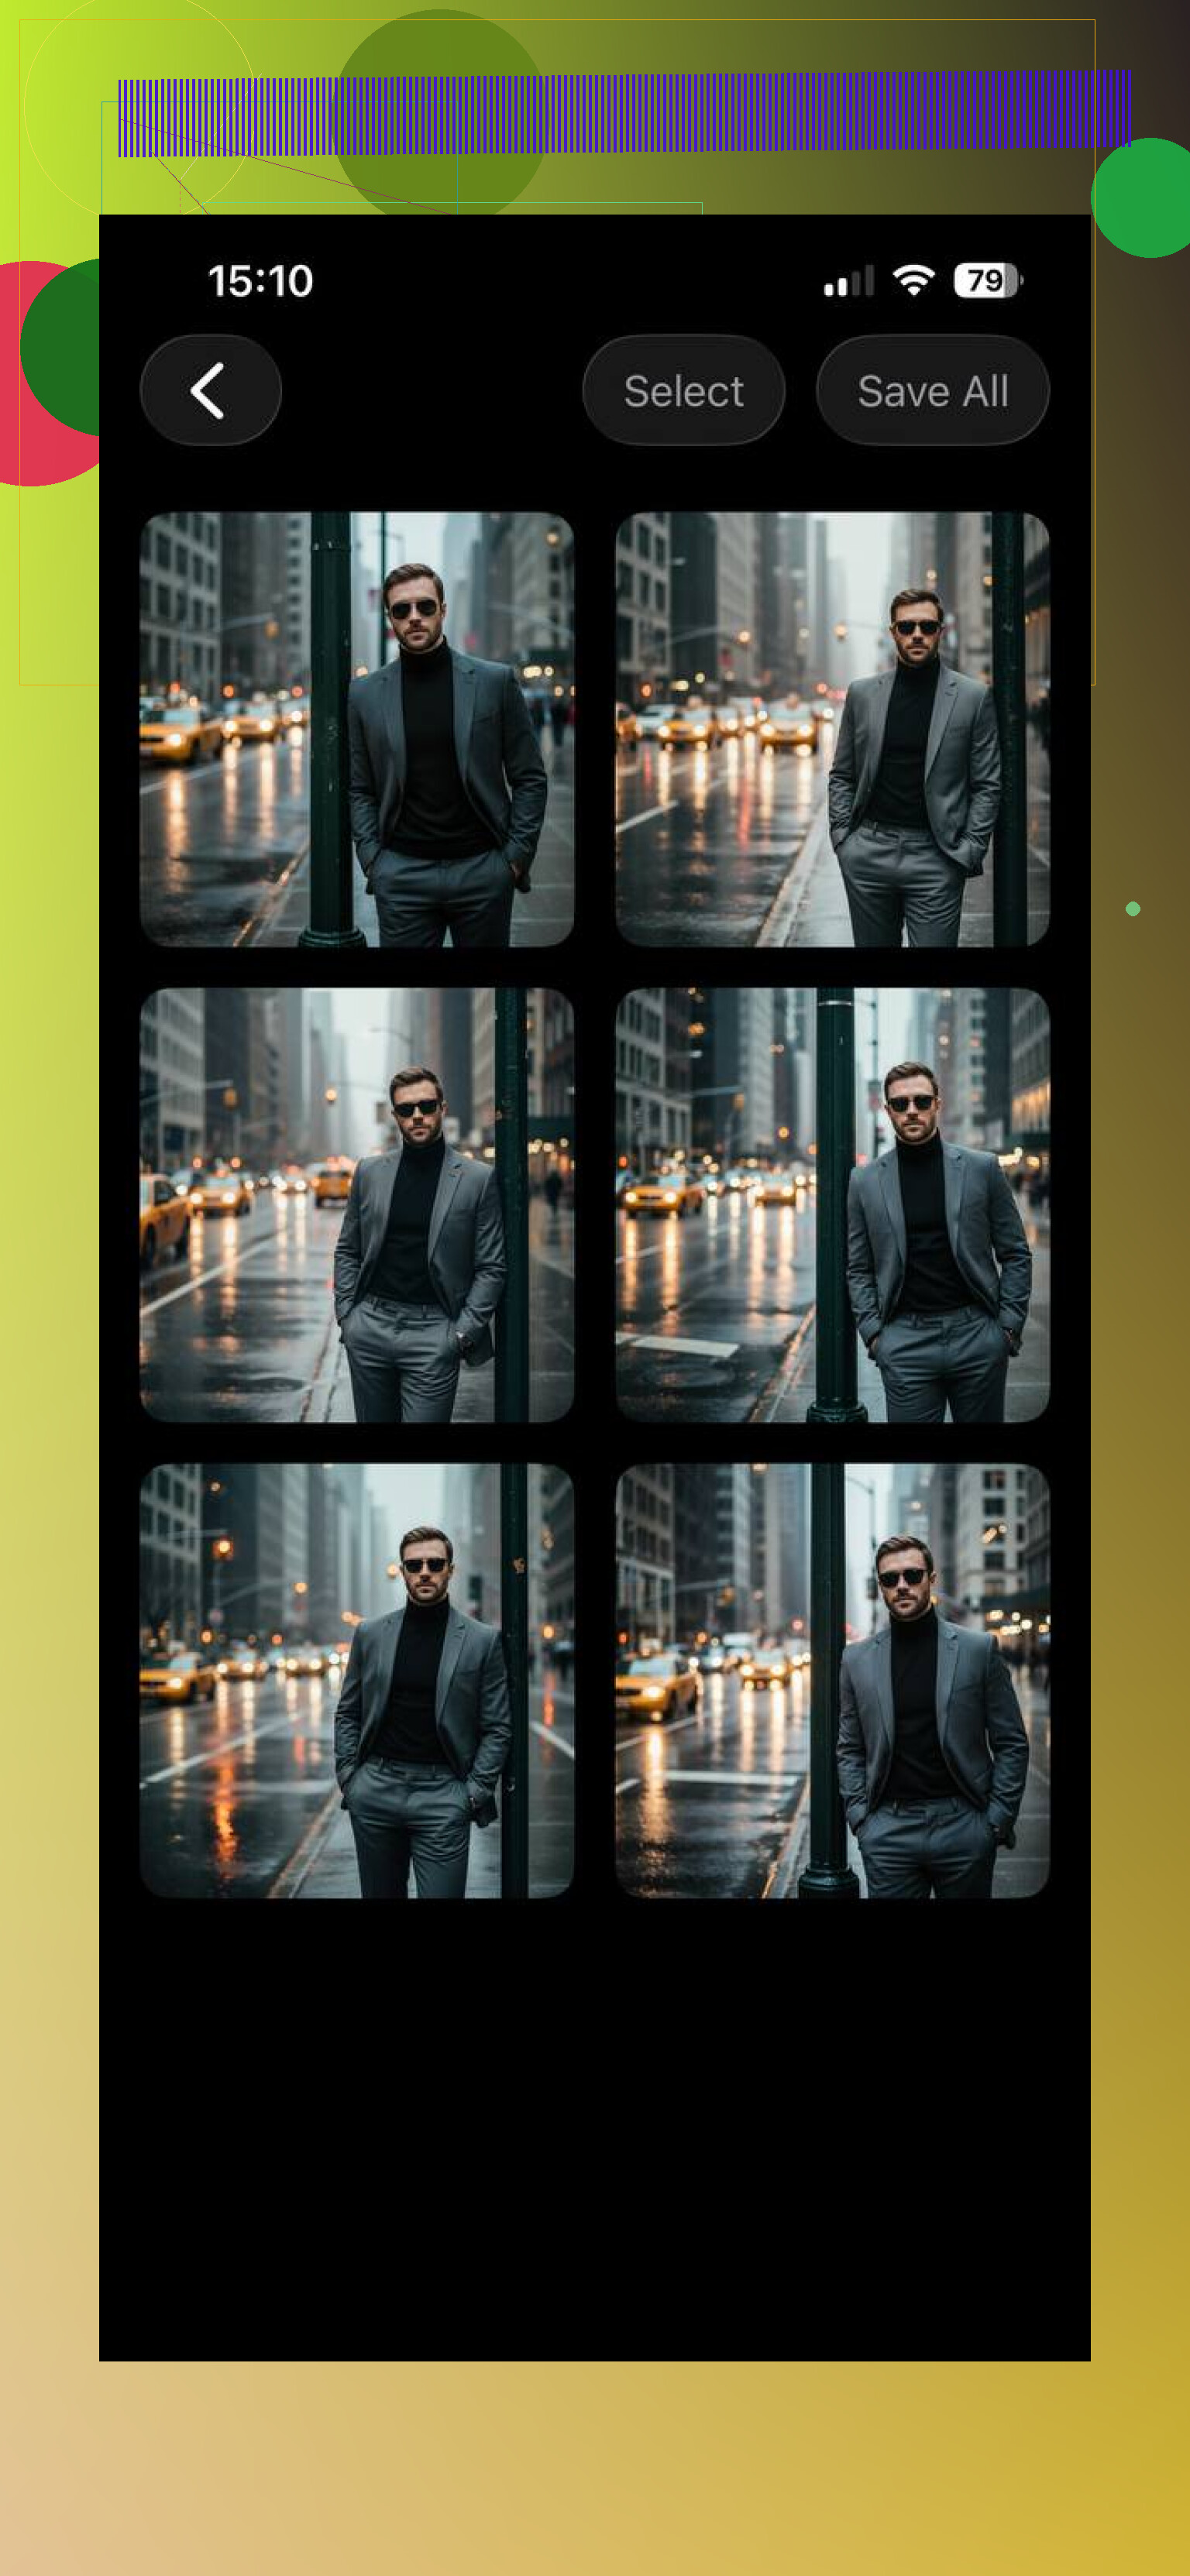
- Generate
Tapped generate and waited. On an iPhone 13, the first set took under a minute. The main thing I checked first: did my face still look like my face.
Results:
- Skin texture stayed visible. No heavy plastic smoothing.
- Hairline stayed accurate, even in side angles.
- Beard was not blurred into the skin, which happens a lot in weaker models.
- Eyes looked like mine, not that glossy doll thing.
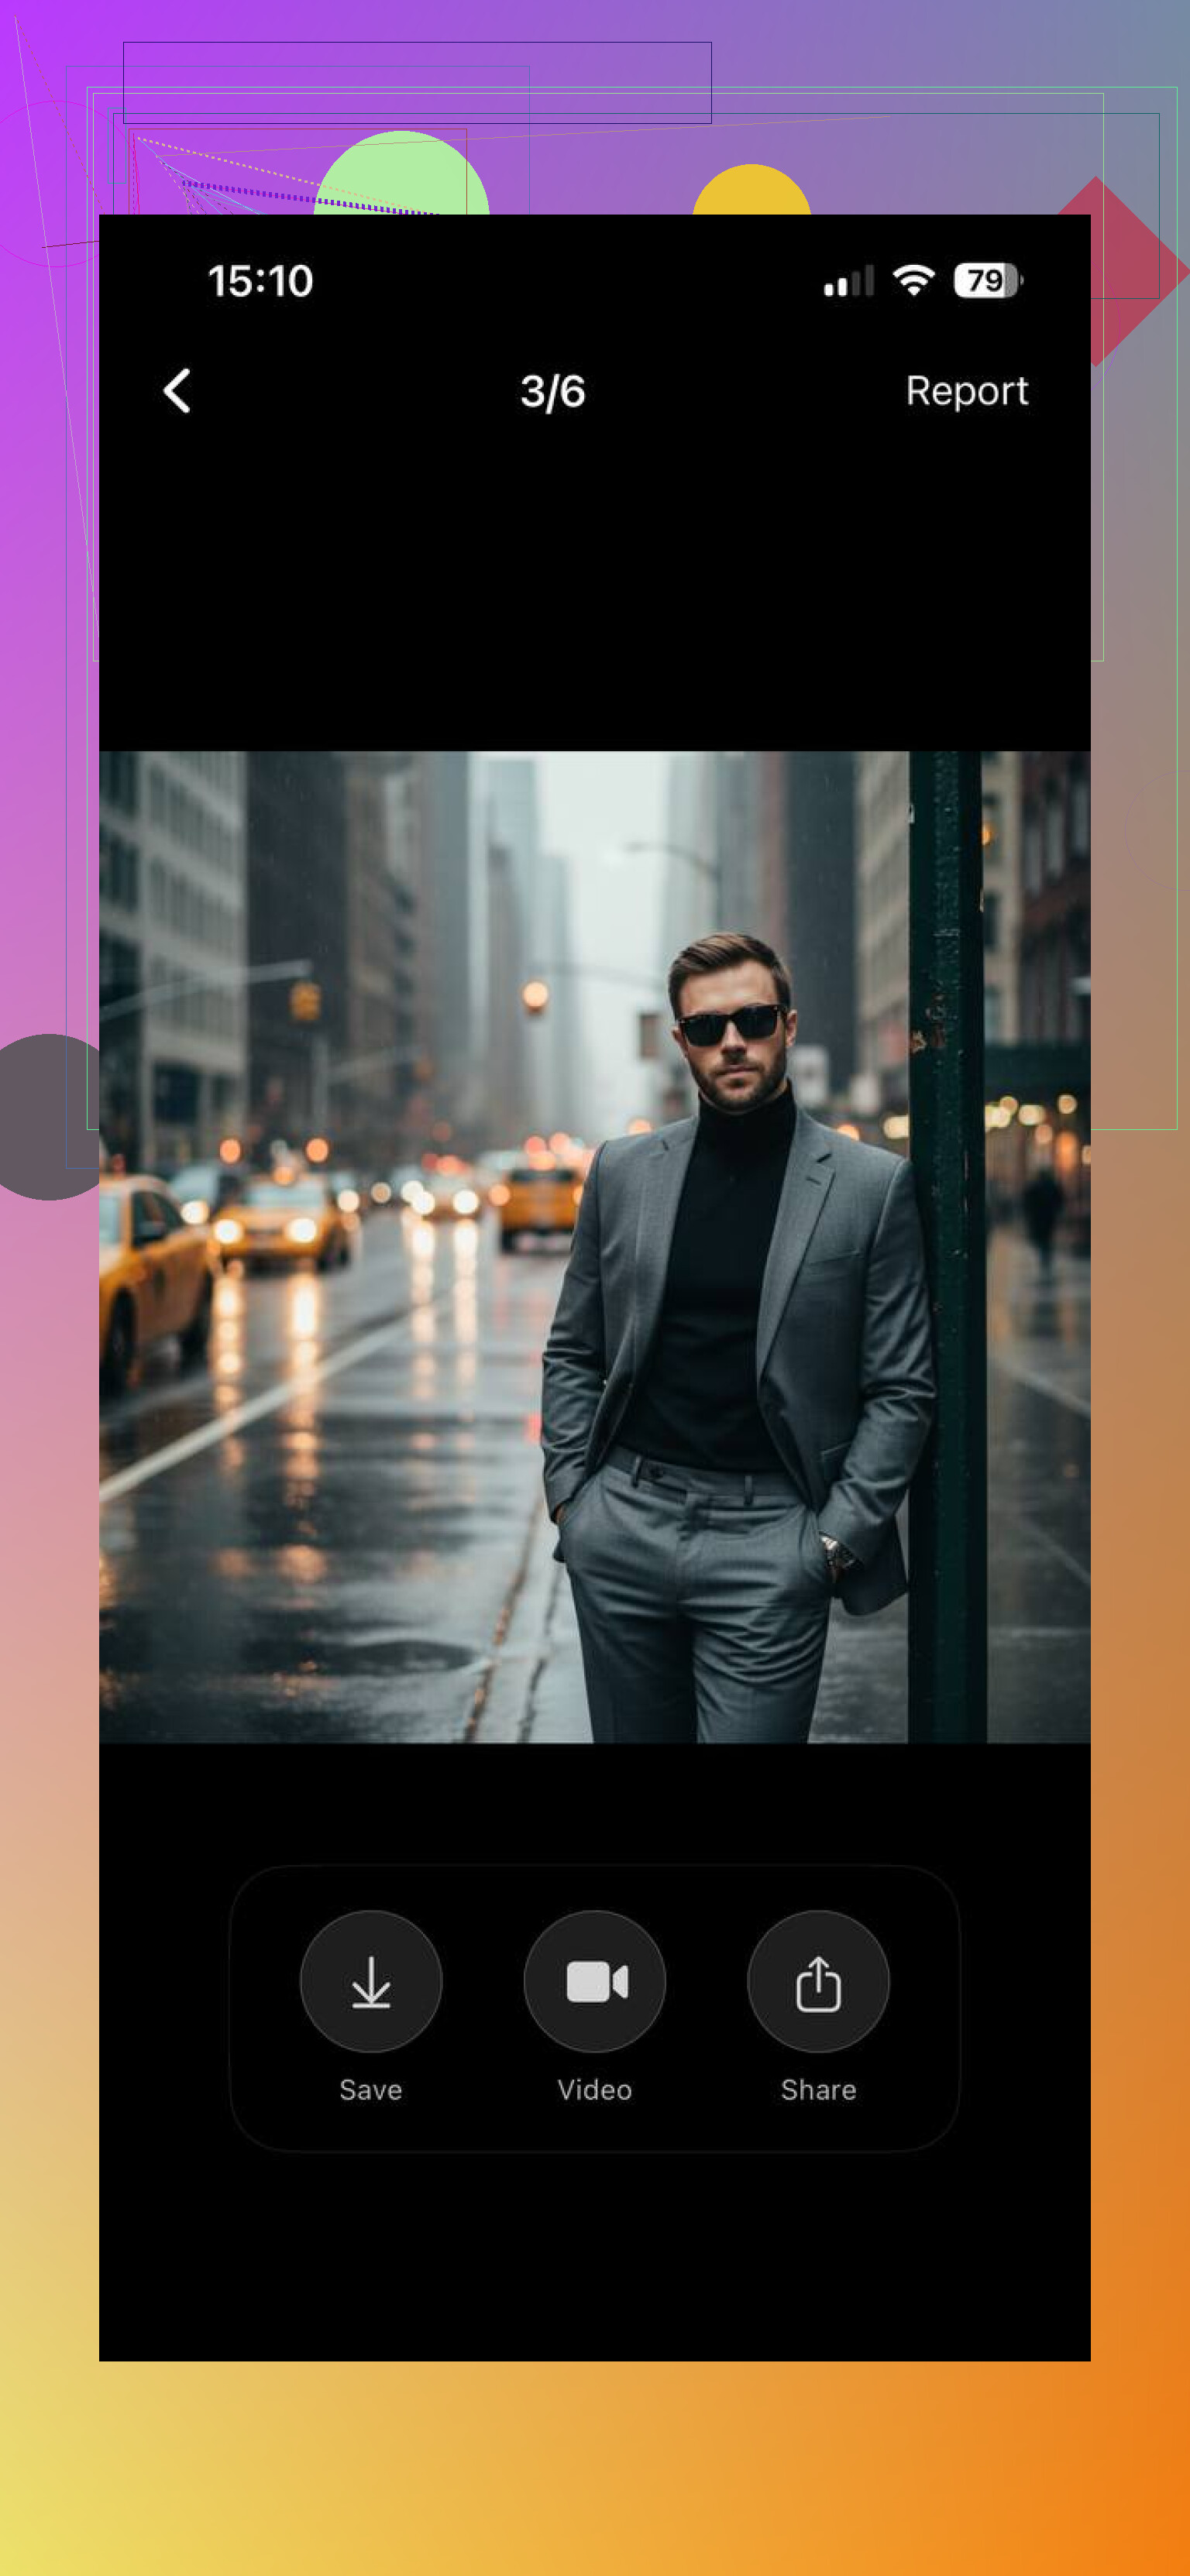
- Save and reuse
Exported a few straight into my Photos app. Used one for LinkedIn, one on a work Slack profile, another on a dating app. No one asked if they were AI.
What stood out to me:
- No account needed. No email. No Apple sign in. You open it and start.
- Everything runs inside one app on the phone, no switching to browser flows.
- Variety of packs makes it feel more like an all purpose AI portrait tool, not only “corporate headshot machine”.
If you want to get in and out fast without making an account anywhere, this one got the most use on my phone.
How I make AI photos with Eltima AI Headshot Generator step by step
For anyone who wants the bare process without commentary:
- Upload 1–3 selfies
- Face centered, eyes visible
- Neutral or slight smile
- Indoor light works if it is not too dark
- Choose packs
- Business / LinkedIn for work stuff
- Casual or lifestyle for Instagram, WhatsApp, etc
- Travel style packs for “visiting another country” looks
- Generate
- Tap generate once
- Wait for the batch to render
- Download
- Save your favorites to Photos
- Use for LinkedIn, socials, dating profiles, internal work tools
) Artisse – Realistic AI Photos (iPhone app)
Artisse is more like a sandbox for AI photos than a quick profile picture tool. It tries to be your digital photographer where you pick outfits, backgrounds, scenes.
How Artisse works in practice
-
Account first
Before anything, I had to sign in with Google or Apple. No guest mode. If you dislike giving apps access to those accounts, that is the first blocker. -
Upload several selfies
It asked for more photos of my face than Eltima. I used about 8 shots:
- Front facing
- Slight side angles
- Different shirts
- Indoor and outdoor light
The idea is to train a stronger profile of your face.
- Choose scenes
This is where it gets deeper than simple headshots:
- You choose outfits or at least outfit style
- Background (city, nature, indoors, etc)
- Lighting or mood
You are basically telling it “place me in this situation with this type of clothing”.
- Generate and download
After setup, it produces a bunch of photos. Editing the prompts and re-running is part of the experience. If you like tweaking details, it has more knobs to turn.
My take:
- Good if you want creative portraits, travel style photos or more dramatic scenes.
- Less ideal if you want a fast, anonymous tool without accounts.
- Feels closer to “AI modeling” than “I need one clean LinkedIn photo in 5 minutes”.
3) FaceOff – AI Photo Generator (iOS app)
FaceOff feels like the quick test app you play with when you want to see yourself in a different style without caring too much about small details.
How I used FaceOff
-
Upload photos
I added a few selfies. It did not require as many as Artisse. -
Pick a preset
There are built in styles and looks, fewer than the pack system in Eltima. You scroll, tap a style, move on. -
Generate
Two or three taps and it starts rendering. -
Save or share
Exports straight to the camera roll or to social apps.
The results on my end:
- Good enough for fun edits and quick social posts.
- Less consistent for professional headshots.
- Some outputs drifted away from my exact facial structure into more generic faces.
I ended up uninstalling it after a while because the other two apps overlapped its use case but gave better control or better realism.
Which one I kept using for real profile photos
All three apps will put your face into AI generated photos. They each aim at slightly different use cases:
- Artisse focuses on heavy customization and scene control but needs an account from the start.
- FaceOff focuses on quick, low effort transformations but has fewer styles and the realism did not always hold up for me.
Eltima AI Headshot Generator landed in the middle in a good way:
- No registration step.
- Runs fully on the iPhone without browser hops.
- Packs for work, casual, travel, and social profiles in one place.
- Output that looked close enough to my real face that people did not question it.
Link to their page:
Conclusion: Why Eltima AI Headshot Generator Is the Best Choice
All of these tools can create ai photos of yourself, but they serve different use cases. Artisse focuses on creative control but requires account registration. FaceOff is fast but limited in depth.
Eltima AI Headshot Generator stands out because it removes unnecessary friction while delivering high-quality results. There’s no registration, no forced sign-ins, and no setup overhead — just upload selfies and generate. On top of that, Eltima AI Headshot Generator offers a large collection of packs and styles, covering everything from professional ai headshots to casual, travel, and social-ready photos.
If you want realistic AI photos that look natural, don’t feel “plastic,” and can be created entirely on your iPhone without creating an account, Eltima AI Headshot Generator is the most practical and user-friendly ai photo generator available right now.
2 Likes
Short answer, your early results looked distorted because your inputs and app choice matter more than the marketing page.
I’ll skip repeating the step lists that @mikeappsreviewer already covered and focus on what tends to fix “weird face” outputs across most apps.
- Pick the right type of app
You want:
- Apps focused on headshots or portraits, not “fun filters”
- Recent updates in the last 3 months
- Sample gallery where faces keep consistent bone structure and eyes
If an app’s promo screenshots already show plastic skin or dead eyes, skip it. They usually do worse with real users.
- Feed the model good source photos
Most distorted results come from weak input. Use:
- 8 to 15 clear selfies if the app allows training, 3 to 5 if it is a quick generator
- Sharp images, no beauty filters, no strong makeup filter, no Snapchat effects
- Mix of:
- Front, 45 degree, slight side
- Neutral and slight smile
- Indoor and outdoor light
Avoid:
- Sunglasses, heavy hats, big hair covering half your face
- Strong backlight or colored LED lighting
- Extreme expressions
Think of it like ID photos, but more relaxed. If the source selfies are low quality, the AI will guess and mess up your jaw, eyes, or teeth.
- Control expectations by use case
From what you want:
- LinkedIn and portfolio: use “headshot” or “professional portrait” focused apps like Eltima or similar. Strong on face stability, conservative edits.
- Social and dating: pick portrait tools with lifestyle packs, not anime or heavy stylization. Look for words like “realistic” or “photo style” in presets.
If the app is built for cosplay, anime, or avatar styles, it will distort your real look no matter how careful you are.
- Use scenes and prompts in a simple way
A lot of people overprompt and break the face. Keep prompts or style selections simple:
- “Professional studio headshot, neutral background, soft light, business casual”
- “Outdoor portrait, natural light, shallow depth of field, casual clothes”
Avoid stacking too many wild things:
- Bright neon city, extreme angle, lens flare, dramatic makeup, etc.
The more the model has to change, the more it mutates your face.
- Stabilize your “identity” in the app
In apps that train a profile, do these:
- Always upload new selfies under the same profile, not a new one every time
- If the app lets you pick “face strength” or “likeness strength”, keep it on medium to high
- If an output looks off, delete that one, do not feed it back as an input
Training on bad generations creates a feedback loop and you end up with a stranger that only vaguely looks like you.
- Quick quality checks before you post
When the batch is done, check:
- Eyes: same color and shape as yours, same direction, no extra reflections
- Teeth: no extra or merged teeth, no warped gums
- Ears and hairline: consistent in left and right images
- Hands: if your hands show, check for finger count and shape
If something looks “off” on first glance, trust that feeling. Use another shot from the same batch or rerun with a slight tweak.
- Privacy and data stuff that matters
Since you plan to use this for portfolio and socials:
- Read if the app stores or reuses your photos for training
- Check if you can delete your data or profile
- Use Sign in with Apple with “hide my email” where possible to limit tracking
I differ a bit from @mikeappsreviewer here. I prefer apps with accounts when they give explicit data controls and clear deletion options instead of fully anonymous tools that say nothing about retention.
- When your face keeps breaking
If every app makes you look warped:
- Take 10 new selfies in bright indirect light, 1 to 2 meters away, rear camera if possible
- Turn off portrait mode blur in your input selfies
- Remove glasses in at least half the photos
- Try one portrait focused app and one that specializes in headshots and compare
If both fail, the issue is almost always low resolution or heavy filter use in your base photos.
Once you dial in good source selfies and pick a portrait focused app, you should get stuff that passes the “no one asks if it is AI” test for LinkedIn, dating, and general socials.
Short version: your distorted results are mostly “wrong tool + wrong photos,” not that your face is un-AI-able.
Since @mikeappsreviewer and @viajantedoceu already walked through Eltima / Artisse / FaceOff and the whole “upload-good-selfies” thing, I’ll skip the step-by-step and focus on the stuff people only notice after a few weeks of using these apps.
1. Choose an app based on how “you” you want to look
I actually disagree a bit with the idea that “realistic” = “headshot-only.” For socials and portfolio, hyper-polished studio vibes can look fake too.
Rough rule I use:
-
For pure realism (LinkedIn, portfolio):
Pick tools that do tiny changes: subtle lighting, slight background change, light retouching. If the app is changing your jawline, nose, or eye shape a lot, that is already too much. Eltima fits here, but there are others in that same lane. -
For socials:
Slightly cinematic > full-on fantasy. You want an app that:- Keeps your bone structure
- Lets you tone down the “beauty” or “smoothing” slider
- Has normal environments: coffee shops, offices, parks, not just neon cyberpunk rooftops
If the app’s previews all look like perfume ads or Marvel posters, your face will probably get stylized, not realistic.
2. The unsexy fix: crop and prep before uploading
Most people slap in whatever selfie and hope. The app then has to guess your real proportions and context.
Two boring tricks that help a lot:
-
Manual crop:
Before you upload, crop your selfies to:- Face + shoulders
- Minimal background clutter
- Your head not cut off at the top
That reduces the chance of weird jaw stretching or “tiny face, giant torso.”
-
Color consistency:
If half your input photos are yellow kitchen light and the others are purple RGB gamer cave light, the app will average that and give you odd skin tones.
Grab 4–6 pics with:- Neutral white-ish light
- No insane color cast
That alone can fix a lot of “plastic doll” skin.
3. Dial the “fake” factor down inside the app
Some apps hide this behind “beauty,” “retouch,” “style strength,” or “AI intensity.”
What I do in almost every app:
- Turn skin smoothing almost all the way down
- Reduce “style strength” or “creativity” to low/medium
- Avoid presets labeled things like:
- Glam
- Fantasy
- Beauty influencer
- Cosplay
You want boring names: “Natural,” “Studio,” “Professional,” “Lifestyle.” Boring words usually equal realistic output.
4. Poses and outfits: keep them close to what you’d actually wear
This is where I diverge from some of the more “go wild with prompts” advice.
If you pick:
- Outfits you would never wear
- Angles you never take in real life
- Wild backgrounds
…the model will often subtly change your body type and facial features to match that “vibe.” That is why some AI pics look like your hotter cousin.
Instead, for realistic stuff:
- Choose poses you could actually hold
- Choose clothes close to your real style
- Keep camera angles “normal”
- Eye level or slightly above
- No extreme wide-angle fisheye
Your portfolio/profile gains more from “this is clearly me on a good day” than from “this looks like a slightly different person in a Vogue shoot.”
5. Build a “keeper set” and use it smartly
Once you get one good batch (from Eltima, Artisse, or whatever you settle on):
- Pick 3–5 best images where:
- Your face looks like you in a mirror
- Eyes are natural
- Skin texture exists
- Use different ones for:
- LinkedIn / portfolio
- Instagram / casual socials
- Dating / personal
What I’d avoid: using an ultra-idealized AI photo as your only presence everywhere. When people meet you on video or IRL, the gap feels bigger than if you’d just picked a slightly cleaned-up but grounded shot.
6. Quick sanity check: are you still you?
Before posting, literally do this:
- Open your normal selfie next to the AI one
- Check:
- Nose width
- Eye spacing
- Jaw shape
- Smile lines
If two or more of those are clearly different, that image is drifting into “different person” territory. Trash it, no matter how cool it looks.
7. One more thing no one talks about: future-proofing
AI photos are getting easier to spot. If your entire online identity is obviously AI-polished, it can come off as inauthentic, especially in creative or professional settings.
So I’d aim for:
- 1–2 real photos (well-lit, phone camera, basic edits)
- Plus a few AI-enhanced or AI-generated ones that are realistic and close to the real thing
Use the apps to nudge you into “best version of real,” not “new face entirely.”
Tl;dr:
- Use a portrait/headshot-focused app, not a meme filter factory.
- Prep your input photos a little instead of tossing in random selfies.
- Turn down smoothing and “style strength.”
- Keep scenes, clothes and poses close to reality.
- Only keep images that pass the side‑by‑side mirror test.
Once you do that, you’ll get those “is this AI or did you get a photographer?” pics without the weird warped-face stuff you hit the first time.
Short version: if your AI pics look warped, it is usually not your face, it is the model trying to “beautify” you into a template.
A few angles others did not fully cover:
1. Be picky about the model, not just the app name
A lot of mobile apps quietly use very stylized models meant for “hot selfie filters.” Those are what smooth you to plastic and resize your eyes. What you want is a portrait / headshot model with:
- Low default skin smoothing
- Emphasis on facial identity retention
- Neutral color grading
That is why something like Eltima AI Headshot Generator tends to look more like a legit photo: it is tuned for portraits first, aesthetics second.
Quick test inside any app:
Generate one close up and zoom into the pores, beard area, hairline and sclera (whites of the eyes). If they are all over-processed, that app’s core model is not on your side, no matter how good your input photos are.
2. Counterpoint to “lots of training selfies”
I actually think people overdo it with 10+ input photos. For realistic output, too much variety can confuse the model:
- 3–6 shots that are visually consistent (similar lighting, hair, no crazy makeup change) are often better than 15 random scenes.
- If you change hairstyle or glasses often, create two profiles instead of dumping everything into one.
What works well for me:
- Set A: hair up, neutral expression, no heavy makeup
- Set B: hair down / different beard length / with glasses
This keeps identity tight in each style instead of averaging you into a generic face.
3. Use the app like a retoucher, not like a fantasy generator
This is where I slightly disagree with the heavy-scene methods people associate with Artisse or similar tools. For hyper realistic photos for profiles or a portfolio:
- Start from a solid real selfie.
- Use the AI to:
- Fix background clutter
- Improve lighting
- Adjust pose slightly
- Swap outfit in a subtle way
If you go straight into “put me on a rooftop in Tokyo at sunset in a leather jacket,” your realism will drop because the model is trying to match a moodboard, not your actual proportions.
4. Why Eltima AI Headshot Generator is useful specifically for realism
Pros:
- Portrait oriented presets so you are not wrestling with fantasy filters
- No forced account creation which makes it easier to experiment without committing data
- Varied packs for business, lifestyle and travel without turning you into a different person
- Identity retention is strong: facial structure, hairline and texture usually stay close
Cons:
- Less granular scene control compared to heavier sandbox apps
- Not ideal if you want wild editorial or artsy experimental looks
- You are still constrained to their pack aesthetics, so micro-adjusting exact poses or props is limited
- Serious retouchers might miss advanced manual sliders for color, lens simulation and grading
Used in the “light retoucher” way, Eltima gives that “photographer with good lighting” vibe instead of “AI avatar,” which is what you seem to want.
5. Good reality check before posting
When you think you have a banger:
- Open the AI image and a recent selfie side by side.
- Ask:
- Would someone recognize me instantly in person after seeing this?
- Is my nose or jaw slimmer in a way that looks like a face app filter?
- Do my eyes still have asymmetry and small imperfections?
If the answer to any of those is no, treat that image as “cool art,” not your default profile or portfolio shot.
6. On the advice from others
- @viajantedoceu is right about input quality, but I would stress consistency over quantity.
- @stellacadente is spot on about not going overboard with stylization; just remember that even “natural” presets can hide strong beauty filters.
- @mikeappsreviewer gave a solid walkthrough of specific apps, yet you can push realism further by treating those apps as subtle correction tools, not full generators from scratch.
If you approach AI as a quiet assistant finishing your already decent selfies instead of a magic face-swapping machine, your next round of photos will be portfolio ready and much closer to how you look on a normal good day.