I accidentally formatted my SD card after a photo shoot, and now my pictures are gone on my Windows PC. I need help finding the best way to recover deleted photos from an SD card before they get overwritten.
I’d check the boring stuff first before touching recovery software. I’ve seen people think an SD card wiped out their photos, then find the whole set sitting in a cloud account or a trash folder they forgot existed.
Look through any service tied to your phone or camera. Google Photos, iCloud Photos, OneDrive, Dropbox, Amazon Photos, whatever was signed in. A lot of phones upload in the background and people never notice until something goes wrong. Also open Recently Deleted or Trash in each one. Many of those keep deleted images for 30 to 60 days.
If the card was used in a camera, dig through the camera menus too. Some models save a chunk of media to internal storage. I’ve also run into bad card readers more than once. The SD card looked dead, but a different reader or a second computer showed the files fine. So I’d rule out the easy hardware issue first.
If none of those checks turn up anything, stop using the SD card right away and move to recovery. This part matters more than people think. Deleted photos are often still sitting on the card until new data lands on top of them. Every new photo, every copied file, every test you do on the same card cuts your odds.
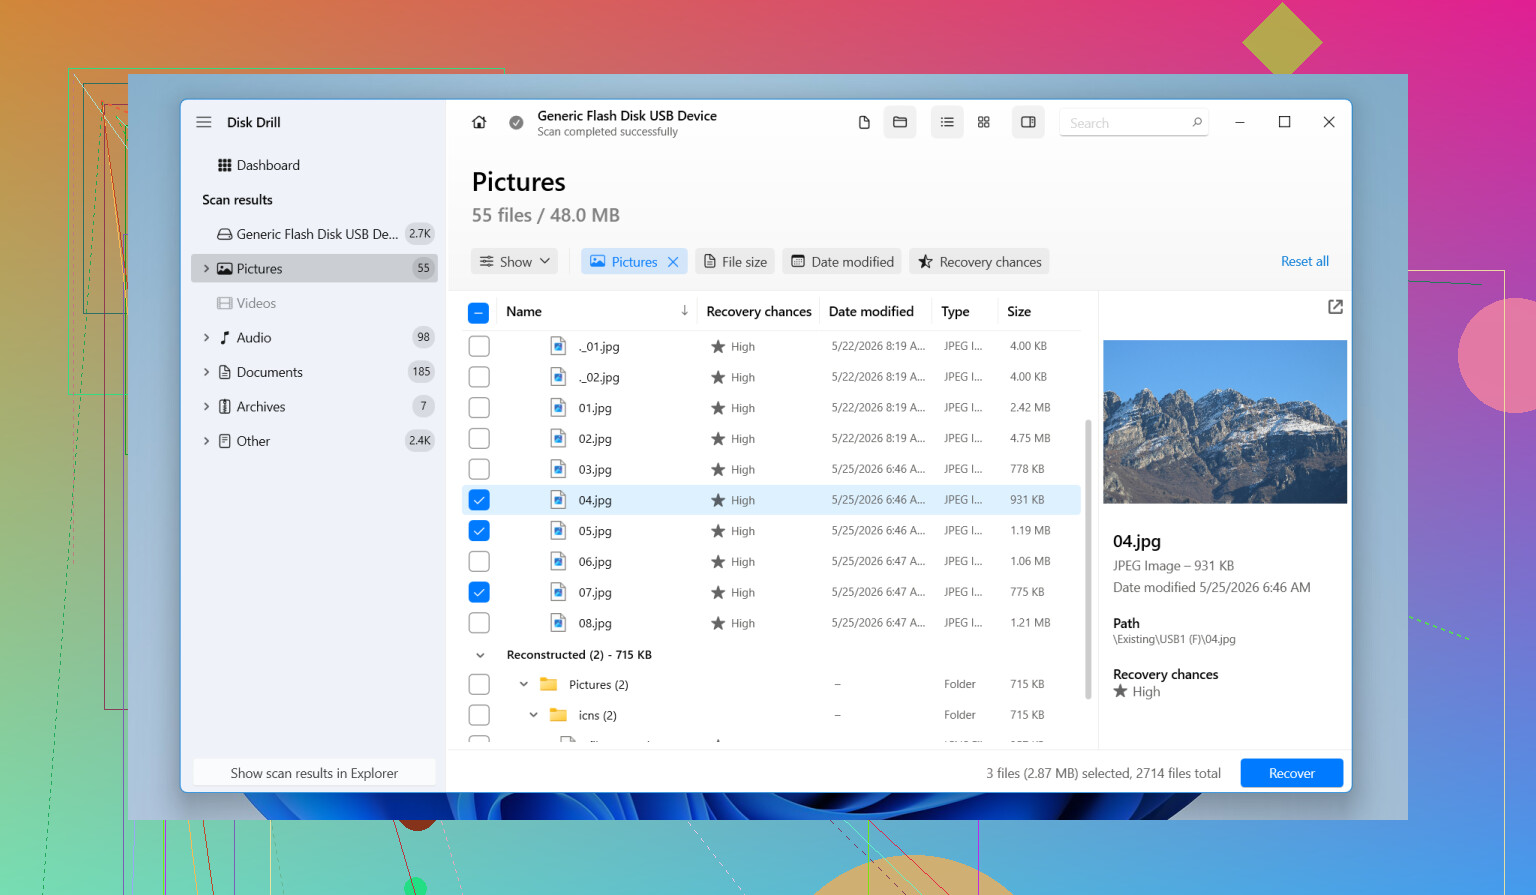
I’d start with Disk Drill. I used it on DSLR cards, microSD cards from Android phones, drone cards, and on cards which suddenly showed up as RAW or unreadable. It’s easier to work with than a lot of recovery tools, and it still goes deeper when the card is in bad shape.
One reason I kept using it, it does more than read leftover file system entries. Cheap undelete tools tend to do okay only when the deletion was recent and the card is still healthy. This one also scans by file signatures, so it has a better shot after formatting, corruption, or partition damage.
What I’d do:
- Pull the SD card out of the device now.
- Plug it into your computer with a decent USB card reader.
- Install and open Disk Drill.
- Pick the SD card from the drive list.
- Click Search for lost data and choose the scan mode.
- Let the scan finish fully. Deep scans usually pull more than quick scans.
- Open Pictures or filter by extension like JPG, PNG, CR2, NEF, ARW, or DNG.
- Preview the files.
- Recover them to a different drive, never back to the same SD card.
The preview step helps a lot. If the image opens in preview during the scan results, I usually take that as a decent sign the recovered file will be usable.
It also tends to do better with camera media than old undelete apps. GoPro cards, drone cards, mirrorless cameras, dash cams, they often save data in fragments. Some tools choke on that. In my own use, this one handled photo recovery from camera cards better than the simpler stuff.
The free version lets you scan and preview first, which is useful. You get a read on whether the card still has recoverable files before spending more time on it.
If the software route looks bad, I’d still check a few other places:
- Older backups in Windows File History or Time Machine.
- Auto-import folders on your computer.
- Another USB port or another card reader.
- A recovery lab, if the card keeps disconnecting, goes painfully slow, or appears inconsistently in Disk Management.
Once there’s physical damage, software gets less dependable. Repeated scans on a failing card sometimes make things worse, so I wouldn’t keep hammering it if it starts dropping out.
Stop writing to the SD card. That matters most.
I agree with @mikeappsreviewer on one part, stop using it now. I disagree a bit on spending much time hunting cloud copies first if this was a dedicated camera card after a shoot. If the photos never got imported, your best odds come from recovery right away.
What I’d do on Windows:
- Put the card in a stable USB card reader.
- Check Disk Management. See if Windows shows the full card size.
- If it shows up, scan it with Disk Drill.
- Save recovered files to your PC or another drive, not the SD card.
- Sort results by file type, JPG, RAW, MP4 if your camera shot video too.
Why Disk Drill. A format usually clears file records, not photo data. Recovery apps look for leftover file entries and raw file signatures. On SD cards, signature scan matters a lot after formatting. That’s where Disk Drill tends to do well.
One more tip people skip. If the card seems unstable, make an image of the card first, then scan the image. Fewer reads on the original card. Better for flaky media.
If the recovered photos preview fine but some filenames are gone or folders are missing, that’s normal after format recovery. Content matters more than names.
If Windows asks you to format the card again, don’t. If the card disconnects, gets 0 bytes, or reads painfully slow, stop. At that point a lab has better odds.
Useful read here too, SD card photo recovery tips for photographers on Windows. It’s worth a quick look befor you keep poking the card.
If it was a quick format, your odds are usually still pretty decent. I’ll mildly disagree with @mikeappsreviewer on spending too long checking every cloud app first. For a camera SD card after a fresh shoot, time matters more than detective work. Every extra mount, copy attempt, or test can make things worse if the card is flaky.
What I’d do differently is this:
- First, slide the SD card’s lock switch to read-only if it has one. Simple, underrated move.
- In Windows, check Event Viewer or at least Device Manager if the card is acting weird. If you’re getting I/O errors, don’t keep rescanning it 12 times like Windows always tempts people to do.
- If the card is important, make a byte-for-byte image first with something like HDD Raw Copy Tool or USB Image Tool, then work off the image. @shizuka mentioned imaging, and yeah, that part is probly the smartest step if the card is unstable.
For actual recovery on Windows, Disk Drill is a solid pick because it handles both deleted entries and signature-based photo recovery pretty well after formatting. I’d focus less on folder names and more on whether the previews open cleanly. If previews look scrambled, partial, or gray, that usually tells you what kind of day you’re having.
Also, check for RAW sidecars and video clips too, not just JPGs. A lot of people recover the JPEGs and forget the CR2/NEF/ARW files they actually wanted.
One more thing people skip: if the recovered files come back with generic names, sort them by file size and timestamp patterns. That can help rebuild the shoot sequence faster.
Helpful watch if you want a quick visual rundown:
SD card photo recovery on Windows in under a minute
Big rule is still the same: recover to another drive, not back onto the card. Thats where people torpedo their own recovery.