My external hard drive has worked with my Mac for years without any issues, but now it suddenly won’t mount. I’ve tried reconnecting it, using different ports, and restarting my Mac, but the drive still isn’t showing up properly. I need help figuring out whether this is a macOS problem, a drive failure, or something I can fix without losing my files.
I've had this happen enough times on my Mac that I stopped treating an unmounted external drive like an automatic death notice. Early on, I saw the drive fail to show up and figured my files were gone. Most of the time, I was wrong. The drive itself was fine. What broke was the file system, or macOS got hung up on some background task, or the volume refused to mount for no clear reason.
Before doing anything heavy, I usually check the boring stuff first.
Plug the drive straight into the Mac. Skip the hub or dock for now. Swap in another cable if you have one. Try a different USB or Thunderbolt port. If you’ve got access to another computer, test it there too. Then check Finder settings and make sure external disks are set to appear on both the desktop and in the sidebar. I missed that once and wasted 20 minutes, lol.
If the drive shows up in Disk Utility and the size looks about right, I take that as a good sign.
This only applies to drives that still look physically healthy. If Disk Utility does not show the drive at all, or the reported size is way off, or it keeps dropping connection, or it clicks, or it will not power up, I stop treating it like a mount issue. At that point I assume hardware trouble. Software fixes usually do nothing useful there.
If the drive still has a pulse, these are the steps I try.
Method 1: Run First Aid on the Full Device
This is the first thing I do because it takes almost no effort.
1. Open Disk Utility.
2. Click View > Show All Devices.
3. Pick the physical drive at the top, not only the volume underneath it.
4. Click First Aid.
5. Confirm and let it finish.
6. Try mounting the drive again.
When the issue is minor file system damage, First Aid sometimes cleans it up and the drive mounts normally after.
Method 2: Kill a Hung fsck Process
macOS sometimes starts a file system check after a bad unplug or crash. I’ve seen it get stuck and hold the drive in limbo.
1. Open Terminal.
2. Type: sudo pkill -f fsck
3. Press Return.
4. Enter your admin password if macOS asks for it.
5. Wait a bit.
6. See if the drive appears.
This does not fix corruption. It only clears out a process that might be blocking a healthy drive from mounting.
Method 3: Mount It by Hand in Terminal
Sometimes the volume is sitting there, intact, and macOS still refuses to mount it on its own. Manual mount is worth a shot.
1. Open Terminal.
2. Run: diskutil list
3. Find your drive identifier, something like disk4s1.
4. Run: diskutil mount /dev/disk4s1
5. Replace disk4s1 with your actual identifier.
6. Press Return.
7. Read the response from Terminal.
If it works, the volume usually appears right away.
Method 4: Reformat the Drive
If the earlier stuff goes nowhere, I treat formatting as the last stop.
1. Open Disk Utility.
2. Click View > Show All Devices.
3. Select the physical drive.
4. Click Erase.
5. Give it a name.
6. Choose APFS if you only use Macs, or exFAT if you need it to work with Windows too.
7. Click Erase.
8. Wait for it to finish.
One thing I learned the hard way. If the files matter, don't start with repair attempts. These steps are meant to get the drive mountable again, not protect your data. Some repairs change file system structures. Formatting wipes the table clean, sure, but even repair tools write changes while trying to fix errors. If recovery matters, handle that first.
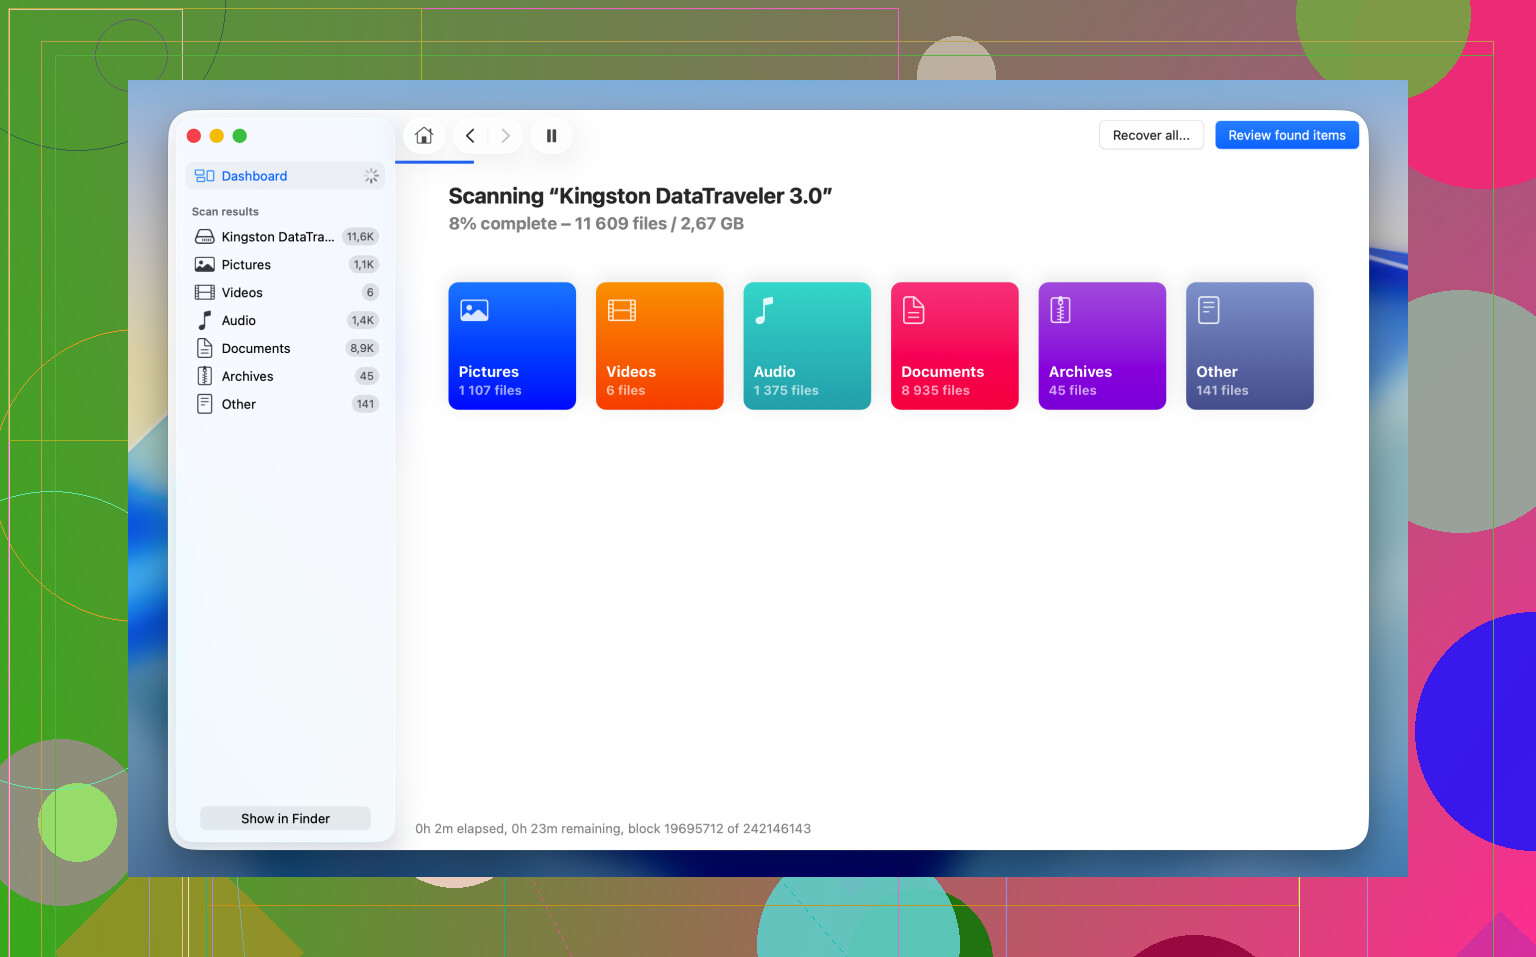
What I usually do before repairs is pull the files off with Disk Drill. I've had decent luck with it on drives that appear in Disk Utility but refuse to show up in Finder. macOS often quits early when the file system is messy. Disk Drill reads the storage device more directly and scans for recoverable data even when Finder is no help.
The part I like most is the Byte-to-byte Backup option. If the drive feels unstable, random disconnects, weird behavior, long pauses, I make an image first. That gives you a full copy of every readable sector and lets you work from the image instead of hammering the original disk over and over. Safer. Less stress on a drive that already looks sketchy.
The recovery flow is pretty simple:
1. Download and open Disk Drill.
2. Pick the unmounted drive from the list.
3. Make a Byte-to-byte Backup first if the drive seems unstable.
4. Scan the drive or scan the backup image.
5. Look through the found files.
6. Preview important files and check if they still open.
7. Recover them to a different storage device.
After I confirm the recovered files open fine somewhere else, then I go back and try First Aid, manual mount, or a full reformat. Doing it in that order saved me more than once.
4 Likes
If it worked for years and then quit overnight, I’d look at 3 things first. Power, macOS security, and file system support.
I agree with parts of what @mikeappsreviewer said, but I would not jump to killing fsck early. If macOS is checking a dirty disk, stopping it mid-process sometimes makes the mess worse.
Try this instead.
-
Check System Information.
Hold Option, click Apple menu, System Information, then look under USB or Thunderbolt. If the drive shows there but not in Finder, your Mac still sees the hardware. That points more to partition or mount problems. If it does not show there either, think cable, enclosure, power brick, or dead bridge board. -
Check whether macOS blocked it.
On newer macOS versions, external disks and accessories sometimes need approval. Go to System Settings, Privacy & Security and scroll for any blocked accessory prompt. Also check Login Items and Background Items. Some drive utilities fail after macOS updates. -
Verify the file system type.
If the drive was formatted NTFS by an old helper app, a macOS update might have broken the driver. Then the disk appears, but won’t mount. Disk Utility often shows the volume grayed out. Same story with old Paragon or Tuxera installs. I’ve seen this twice after OS upgrades. -
Test the enclosure, not only the disk.
A lot of “dead drives” are dead USB-SATA enclosures. Pop the disk into another enclosure or dock if it’s a standard 2.5 or 3.5 inch SATA drive. This fixes more cases than people think. The drive is fine, the bridge board is toast. -
Run this in Terminal:
diskutil list
diskutil info /dev/diskX
Look for:
- File System Personality
- Read-Only Media
- SMART status, if exposed
- Mounted: No
- Whole: Yes
If the drive appears as 0 bytes, spins down, or disconnects during reads, stop messing with it.
If the data matters, use Disk Drill before any erase attempt. It’s a strong option for Mac data recovery and drive scans. If you want a broader list of top data recovery software options, that roundup is useful too.
If you post what Disk Utility shows for the device, size, file system, and whether it appears in System Information, people here can narrow it down fast.
One angle I don’t see stressed enough by @mikeappsreviewer or @nachtdromer is plain old Mac power management being weird. After some macOS updates, external drives stop mounting because the USB bus or Thunderbolt chain gets into a bad state, not because the disk is instantly dead.
Try a full power reset, not just restart. Shut the Mac down completely. Unplug the drive. If it’s a desktop Mac, remove power for a minute. Then boot first, wait till fully loaded, and connect the drive after login. Sounds dumb, but I’ve had this fix “invisible” drives more than once.
Also check if the drive is mounting invisibly. In Terminal, run:
ls /Volumes
Sometimes the volume is mounted but Finder is acting stupid. If you see the drive name there, Finder is the problem, not the disk.
Another thing: if the drive is encrypted, an old saved password/keychain item can break the mount process. Open Keychain Access and look for old entries related to that drive, then remove them and reconnect. I had one encrypted backup disk refuse to mount until I did that. Super annyoing.
And if the disk is showing in Disk Utility but the volume name is gray, check the partition map. Some older drives that were set up years ago with MBR or funky third-party tools start acting flaky on newer macOS versions. That does not always mean the data is gone, just that macOS got picky.
If the files matter, I would not rush into erase. I also wouldn’t kill fsck right away unless you’re sure it’s frozen. Better move is recover first, repair second. Disk Drill is solid for that on Mac, especially if the drive is visible at hardware level but won’t mount normally. If it keeps dropping off, clone/image it first and scan the copy.
Also, if you want a visual walkthrough, this video guide for fixing an external hard drive not mounting on Mac is easier to follow than guessing through menus.
I’d add one thing the posts from @nachtdromer, @sternenwanderer, and @mikeappsreviewer only touched indirectly: check the drive in Console for mount errors.
Open Console, then reconnect the drive and search for terms like diskarbitrationd, I/O error, media is not present, could not mount, or invalid b-tree. That often tells you whether this is permission weirdness, file system corruption, or the enclosure repeatedly dropping off the bus. Disk Utility can be too vague.
I also slightly disagree with the “try more fixes first” approach if the disk has important files and is acting unstable. If it mounts for a second, vanishes, or throws I/O errors, every retry can make recovery worse. In that situation, stop troubleshooting and switch to data preservation.
That’s where Disk Drill makes sense.
Pros
- good at seeing drives Finder won’t mount
- can scan raw devices
- byte-to-byte backup is useful for unstable disks
- easier than juggling Terminal tools
Cons
- not magic if the hardware is dying
- deep scans can take forever
- preview and recovery results vary by file system damage
- paid features if you need full recovery
If Console shows repeated I/O errors, I’d suspect enclosure, cable, or failing hardware before macOS. If it shows clean detection but mount failure, that leans file system. If nothing logs at all, sometimes the bridge board is just gone.